About This Blog...

I started this blog as a means of promoting my Etsy Shop. Most of the items here I have sold, or are for sale there. Take a peek. I think you'll like it.
Showing posts with label Trunks. Show all posts

Monday, May 18, 2015

Upcycled Suitcase Becomes a Campaign Writing Desk


This is what I started with. It looks like old suitcase, but it was actually a small wardrobe trunk. On one side there was a swing down tray, and the other side, hanger brackets.  


The first step was to remove the all the guts from the inside. One end of the trunk was hinged and, when stood on end, this panel would swing out of your way so you could access your clothes. Since the desk would not need this, the brackets were removed and the panel screwed closed.


Once the interior was removed I added some textured paper. 
You can see this in my reline an old trunk post


                 Here's the paper glued in place.     


 Probably the most important part of the desk is the structural frame. It stiffens the panels of the desk, provides something firm for the drawer to ride on, gives the legs something solid to bolt to, and will really hold the weight of the desktop. It's just a simple flat frame that will sit in the bottom of the trunk.

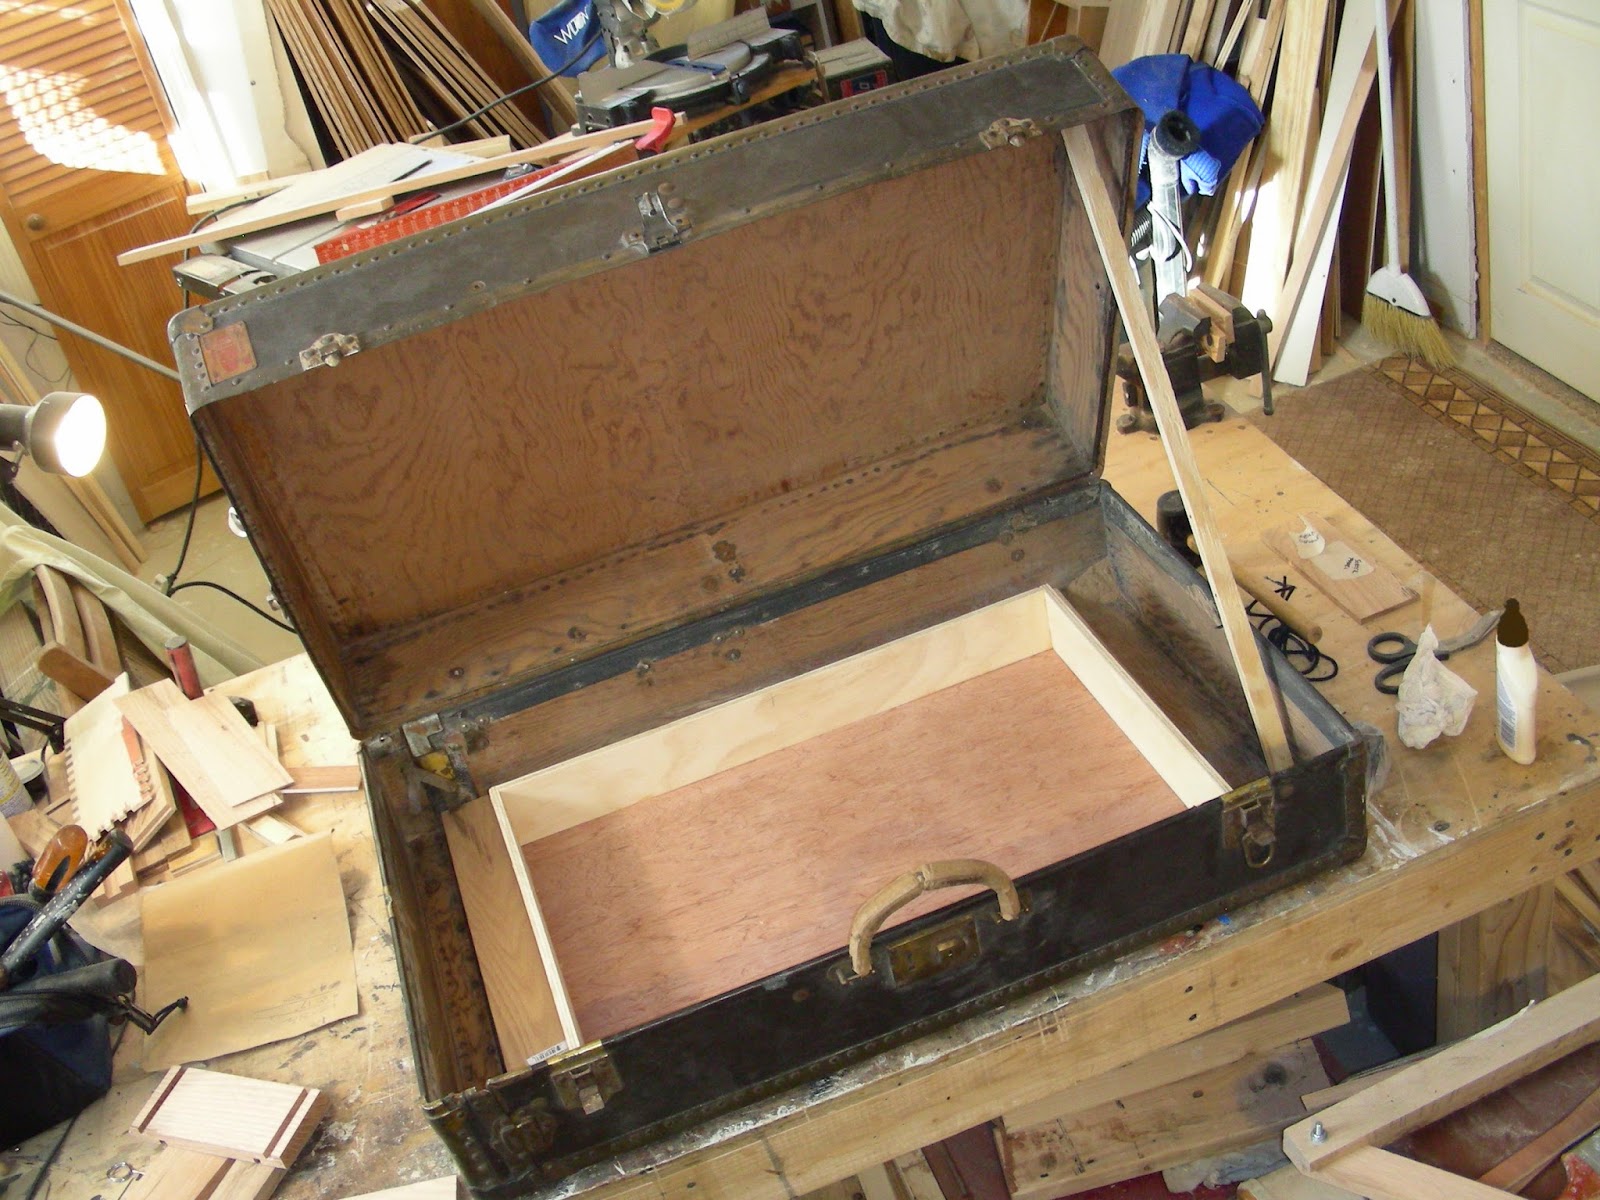


   The drawer is a shallow plywood box constructed with box joints and a dado joint around the inside to hold the bottom of the drawer.


The height of the drawer is figured from the top of the structural frame (on which the drawer will sit) to the under side of the desktop.


This is a close-up of the drawer runner on the underside of the drawer. The runner will attach to the bottom of the drawer and the rail will span the frame.


I know...sounds confusing...so here's a labeled pic of the structural frame.


Here's the drawer riding on the frame.


Next up came the legs. I designed a simple "X" style leg to keep with the campaign style look I was going for. I drew it out full size on some rolled craft paper so I can transfer all the angles to my miter saw and can check the pieces after they're made.


The assembled legs.


All the wood pieces on this project are made from salvaged oak flooring. Here the desk top pieces are glued together and clamped.


Once the glue is dry the desktop is flipped over, trimmed down to size, and fitted in place.


Thin oak pieces are glued together to form the top and bottom pieces of the sorter. Then dados were cut to hold the divider pieces, the end pieces were left thick, and a thin plywood panel was nailed onto the back.


I made some small drawers out of thin plywood for end cubbies on the sorter. Oak veneer was glued on the front to dress it up, and leather pulls made from a Salvation Army belt.


Trim, sand, check the fit; trim, sand, check the fit; sand, check the fit...you get the idea. Once everything seems to fit well comes the part I hate most; cutting the front panel off to make the drawer face. If I screw up badly I've ruined the suitcase.  (I did screw up...but not badly)


I lined up the drawer face on the front of my drawer, drilled a few small holes, and used some small nuts and bolts to attach it.


I made a few more accessories from oak including a cork board frame (left), a retaining knob (middle), and a swing down shelf (right).


 The hard board fill of the handle was exposed when I got the trunk so I had to cut a piece of leather-look vinyl and hand stitch it around the handle.


The sorter attaches to the suitcase lid with a very blurry nut and bolt. 


A coat of stain and a few coats of poly round out the finish.


Detail of the leather pulls on the sorter drawer.


Sorter and shelf fold into the lid.


Other than a good cleaning the outside of the case was left as is. All the peeling labels are original and character and provenance to the piece. The desk closes up when when company's coming.


Now I can sit down and get some paper work done--just as long as I don't wake Jessie.


Sunday, November 2, 2014

Upcycled Trunk Lid Coffee Table

I may have been able to cobble together enough pictures to create a woefully inadequate post about the the creation of this coffee table. 


A trunk lid is kinda flimsy on its own, so I lined it with plywood to beef it up. It will hold a heavy stack of books without sagging.


 I really wanted to have "X" style legs on this which means I need a small spacer on one side of the leg assembly to account for the thickness of the other leg.


The shelf serves two purposes. It adds a little more storage to the table and stiffens the legs so the table won't be so wobbly. Again I needed to add a spacer piece to one side to account for the thickness of the leg.

Hey how did you actually make the legs? 

Good question blog reader. I drew out a full scale plan for them on a large piece of paper so I can lay everything out and play with it until I get it the way I want it. Then I can transfer the angles to my miter saw and the position of the holes directly onto the wood.


All the hardware was spray painted with a metallic finish, the rest of the lid painted black, and the legs and shelves stained, and sealed with a few coats of poly.


Saturday, November 1, 2014

Upcycled Trunk Bookcase and Side Table Set


                                                                                                                                                                      The first thing I did was cut through the hinges to remove the lid. Then I drilled through the rivets to that held all the little bits of hardware that I needed to remove like these brackets and the lid stays.


   This old wine crate fits the width of the trunk so I'll use it as a drawer. I'll cut down its depth so it fits perfectly.


I found this hi-res map graphic online and printed it out on standard size craft paper sheets.


I'll start in the middle and work my way out to make sure I have my graphic centered in the trunk.


Once everything is dry I'll trim away the edges, and then put some graphics on the side panels.


Next I spray painted all the metal parts. I didn't worry about taping off anything as I'll be repainting the body of the trunk any way.


 While that was drying I took the back off the crate and cut it down on the table saw making really sure that there were no nails in the path of the blade. Then I put it back together. Now the depth was just right.


Checking the fit.


I cut down a thin plywood panel to line the inside of the crate so that no one would have to touch the rough sawn wood on the inside.


I flipped the trunk over to work on the drawer runners and rails. The dark wood will be the runners and will attach to the drawer. the lighter wood will be the rails and will attach to the trunk. The other pieces are just spacers.


 I drilled through the sides of the trunk to attach the rails.


Then I glued and nailed the runners to the sides of the crate.


After a lot of sanding I rub candle wax over the rails and runners so that everything will glide smoothly.


I cut down a pine board to make shelves for the inside, sanded, stained and gave them a clear coat of poly. They'll be screwed through the sides of the trunk to hold them in place.


I cut the feet from a piece of 2x4 on my table saw.


I just screw through the bottom of the trunk to attach them.


The outside of the trunk was painted black and given a few coats of clear poly. Everything was reassembled once dry.


Drawer Detail