About This Blog...

I started this blog as a means of promoting my Etsy Shop. Most of the items here I have sold, or are for sale there. Take a peek. I think you'll like it.

Tuesday, January 21, 2014

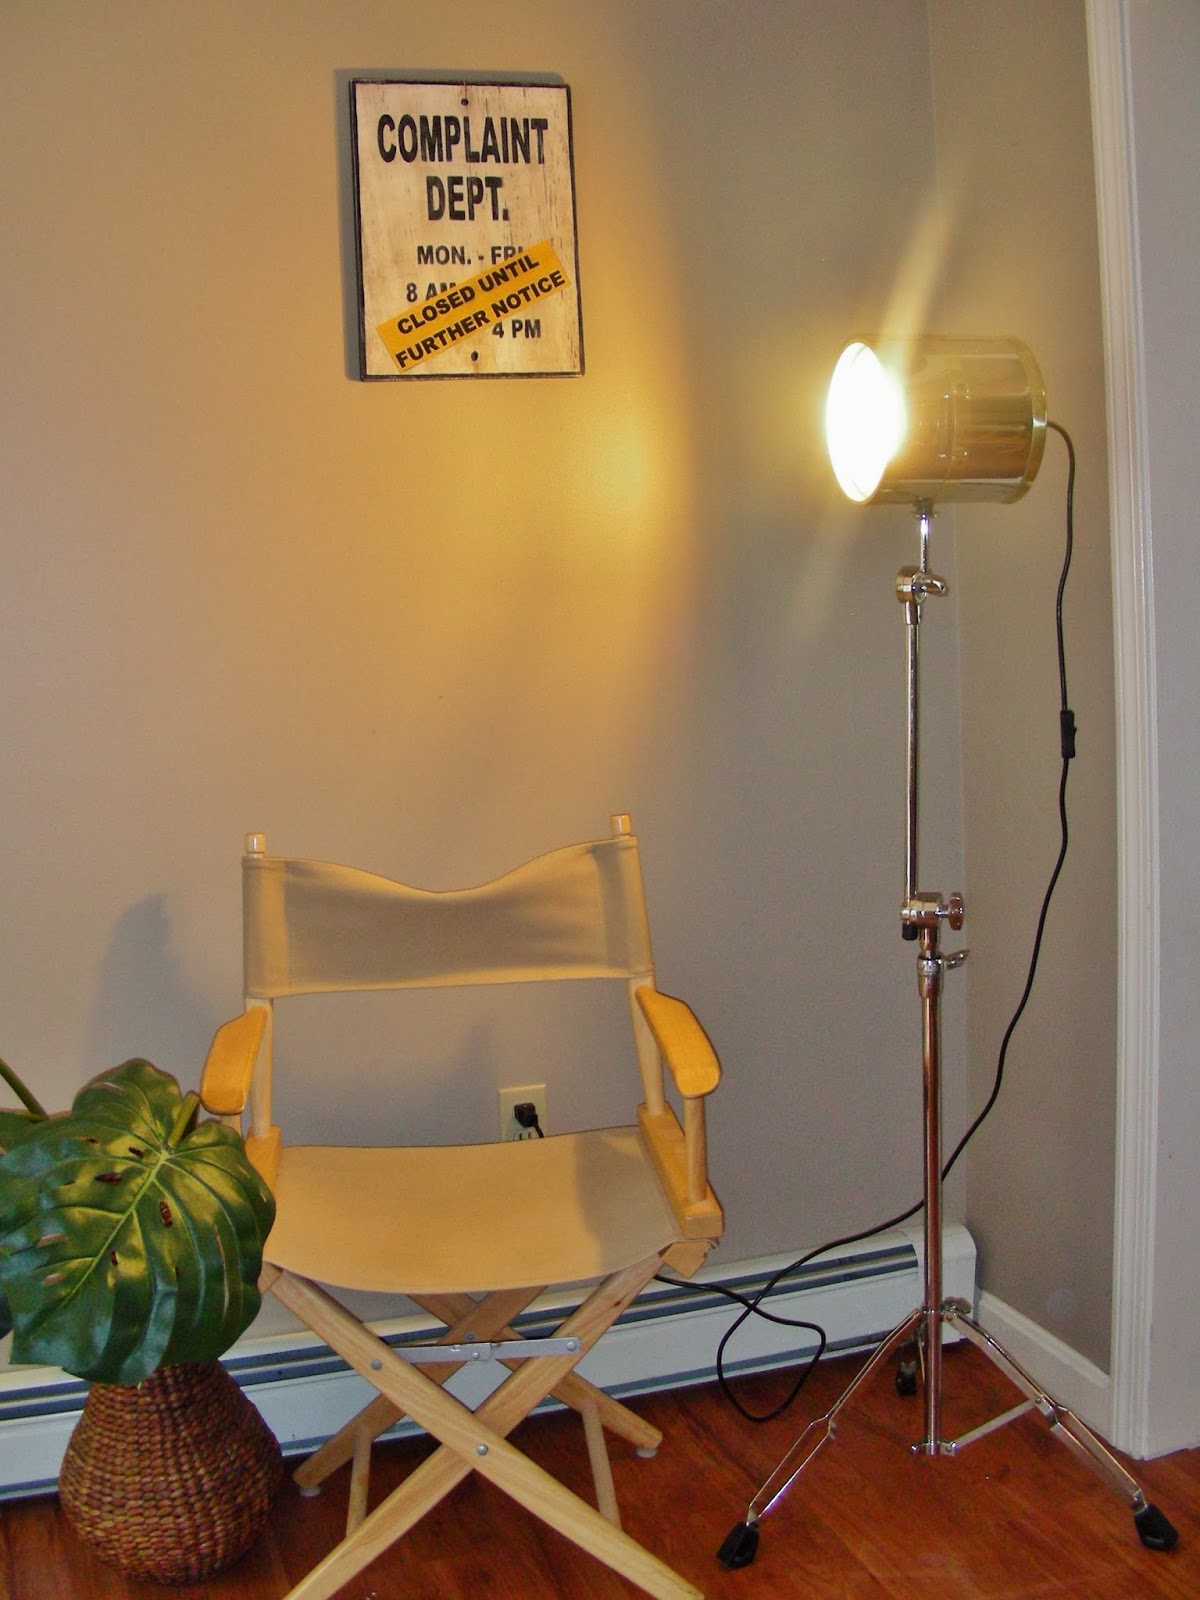
Tripod Lamp Made from Crutches

The Inspiration
This picture stared it all. It was small and in the corner of my computer screen and, at a glance I thought it was a picture of some old crutches. When I looked a little closer I saw that it was a way cool vintage tripod lamp, and I thought, Hey...


The hard to find wood crutches

The first thing I had to do was find a couple of sets of wood crutches that were similar. This was surprisingly difficult. It took most of the summer to find some at flea markets and yard sales, even craigslist didn't have much. Most of the ones I found were aluminum.


Once I found them the real work began. I squared off the top of the arm rest at the top of the crutch, drilled some holes in sides and inserted some hanger bolts. Next I drew an equilateral triangle on some paper, cut it out, and used it as a template to cut out the "hub" that the legs would attach to. I used some 5/8ths plywood that I had lying around.


I got some metal brackets from the hardware store and screwed them to the hub using the top of the crutch as a guide. I carefully drilled some holes in the top sides of the crutch and inserted some hanger bolts.


oops...forgot to take pics before I painted


After this the rubber feet were removed and a slight taper cut into the end.


Next I removed the handles and added some jack chain which will stop the legs from sliding out.


Once all the construction was done the entire thing was disassembled, sanded, and painted in a faux dark wood grain. The tips of the feet and a few other spots were painted with a silver spray paint in a hammered metal finish. The silver parts were a little too shiny so I brushed a little black paint over them, let it sit for a few seconds, then rubbed it off to give them a vintage look.


Then I added a new socket and other lamp parts including a vintage look wire.


The Finished Tripod Lamp


Friday, January 3, 2014

Freestanding Chalkboard form Vintage Sidetable


The chalkboard

    This is a freestanding chalkboard that I made from a vintage side table. I knew the table top would make a great chalkboard, so I figured that I could use the pedestal on another project, but when I stood it next to the feet, it just clicked. I cut up a 2 x 4 to use as bracing and painted the back a dark brown so it would look like it's always been this way.


Before


Saturday, August 31, 2013

Upcycle An Old Trunk, Part 5: The Finished Trunk


This is my finished trunk. The hotel labels were put on and the whole thing sealed with a coat of modpodge.


Don't forget the most important part of any expedition....the whiskey!


I had to photo edit this picture to darken it. This is what the real trunk looks like. In the rest of the pictures the white of the zebra stripe looks a lot lighter than it does in real life.


 At the time of this posting this trunk is for sale at my Etsy Shop Destinations Vintage. Look for it, or more stuff like it there.


Thanks.


Friday, August 16, 2013

Upcycle An Old Trunk, Part 4: Painting.

 I started by lightly sanding all the blue surfaces of the trunk. This is the part that most people will want to skip...DON'T. Without sanding all the paint you put on will scratch right off.

I did around the edges first being careful not to get any paint on the brass pieces or trim.


It took at least 3 coats to cover it decently.


Next I drew on some lines, very lightly in pencil, and painted them black to resemble zebra stripes.


Then I printed out some letter graphics, colored the back of them with a piece of chalk, and laid them out on the trunk using a framing square to make sure they were straight.

After taping them in place I traced around the letters with a pen. This left the chalk outline of the letters on my trunk.


Then I painted inside my chalk lines with some red paint, and yes, it took more than one coat.


Next I started sanding. I used a 150 / Medium grit sandpaper. Once upon a time I used a 80 grit coarse sandpaper thinking it would be much faster; and it was. In no time flat I had a trunk that was all scratched to hell instead of looking gently worn.

In this picture the left side only has been sanded so you can see the difference between that and new paint.


Then I mixed a little brown paint in a quarter cup of water and painted all over the trunk to antique it.
t

This is not the best picture, but you get an idea what it is starting to look like.


The next step was to print out some vintage hotel labels and coffee stain them. You can see this step in a previous post here.


Sunday, June 30, 2013

Upcycle An Old Trunk, Part 3: Painted Faux Leather

In the last post I talked about relining an old trunk, in this one I'm gonna paint it.


First I mixed some black and brown paint together to make a super dark brown and painted it on the tray and inside the trunk.


Next I took some brown craft paint in a shade that was dark, but still lighter than the last color (for this I'm using the one on the left) and put just a bit of it in a small container. Then I dipped my brush in just a bit an wiped that tiny bit of paint back and forth to spread it through the brush. The idea is to have very little paint on the brush. The bristles should be almost dry.


I painted this color very lightly over the darker one just barely grazing the surface at first, then pressing a little bit harder as the brush started to run dry. If this is done right more of the paint should come off on the higher parts of the wrinkles and less on the lower. I had to be careful not to completely cover the first (darker) coat.


Here's a close-up of what it looks like when it's dry. I probably covered about three quarters of the first coat putting it thicker in some places and thinner in others at random.


Then I took my lightest color and did the same thing, but this time I went even lighter than the last. This color is supposed to be just the highlights.


When these colors go on they look really light and bright, but darken as they dry. (In case you're wondering where that nifty little paint tray came from it's a package that some washers came in)


Here's a close-up of the finished job.


An here's the finished trunk interior before a clear coat of poly. Sometimes the the poly will re-wet the craft paint, but if I avoid any excess strokes it won't be too bad.

                                                                           
Remember...Do Not Taunt the Sasquatch! 


Saturday, June 15, 2013

Upcycle an Old Trunk, Part 2: Relining and Old Trunk

This is a trunk I'm making for my Etsy shop
I'm going to be painting it in a faux leather finish. I posted about this eariler in this blog, this post is going into alot more detail, and feature a lot more pictures. I'm starting with relining the tray, but everything here will apply to relining the inside of the trunk too.

Stuff you'll need:
tape measure, large square, pencil, scissors, an iron, and plain craft paper.


 Before starting I removed any loose old paper, this didn't take long as most of it was pretty secure.

First I measured the sides of the tray. I doubled the height dimension as I would be starting on the inside and wrapping the paper around to the outside, then I added an inch and a half to both dimensions so there would be some overlap. I measured out my pieces, making sure they were square, and cut all of them out.


 To texture the paper to make it look like leather I crumpled and uncrumpled it about 6 or 8 times.


 Then I ironed it, being sure not to completely remove all the wrinkles. It made the texture awesome.


Next I poured out a little mod podge on the surface I was papering and spread it around with a brush. This is a lot faster than just painting it on. I also made sure to spread it up the adjacent sides.
 Then I laid on my paper overlapping the other sides just a bit. I had to work fast as the mod podge tends to dry fairly quick. Starting in the middle I gently pressed it down working out any air bubbles as I worked my way to the edges. I used a putty knife to really get it tight into the corners and edges.
 One thing that can not be said enough: YOU REALLY GOTTA KEEP PRESSING THE PAPER DOWN AS IT DRIES OR YOU'LL GET AIR BUBBLES UNDER THE PAPER.


I slapped some mod podge on the opposite side and carefully wrapped the paper over it, and again, pressed out all the air bubbles.


Once the sides were done I cut my pieces to fit in and on the bottom of the tray. These were made just a little bit smaller than the actual sizes needed, but big enough to cover the overlaps


Here's a close up of the texture.


On the inside of the trunk I had to work around the rails that hold the tray and the lid bracket. It doesn't look so good now, but once painted it won't be so noticeable.