About This Blog...

I started this blog as a means of promoting my Etsy Shop. Most of the items here I have sold, or are for sale there. Take a peek. I think you'll like it.
Showing posts with label How To. Show all posts

Monday, December 21, 2015

Hanging Chalkboard Sign

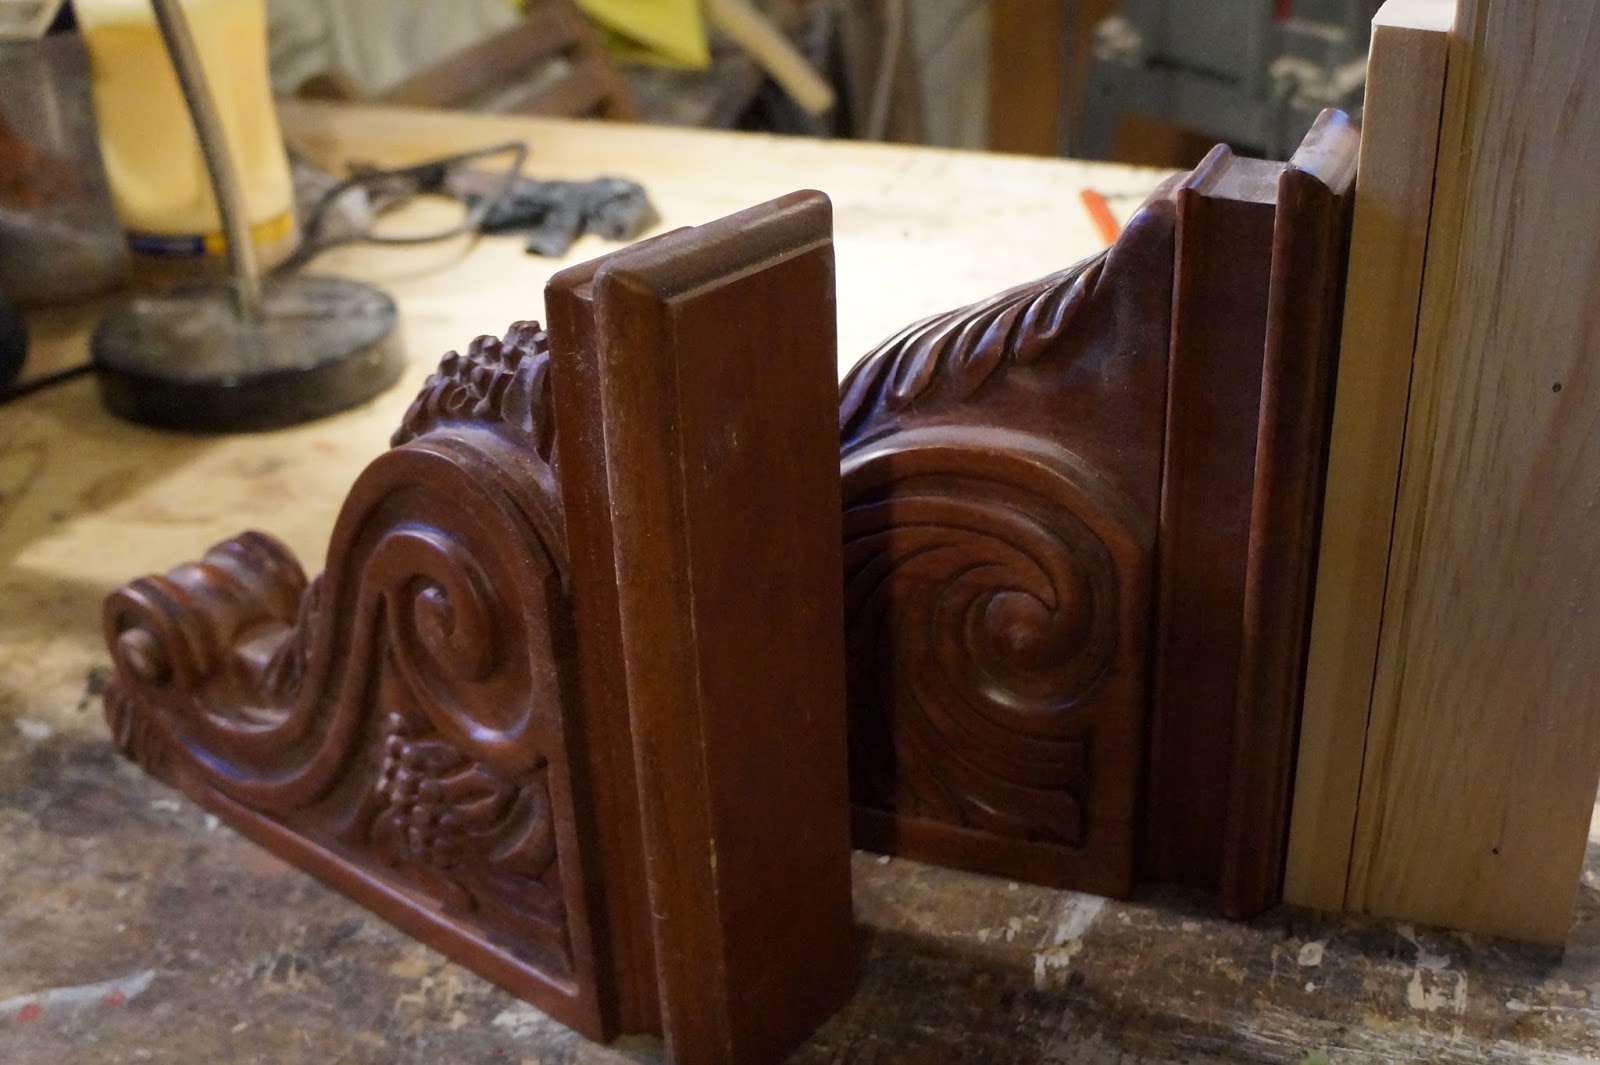
These are corbels I bought at a flea market. At first I thought I would make a mantle-shelf with them, then I noticed that they didn't match, so I really could not use them in the same piece. Then I came up with the idea of a hanging chalkboard sign. 


First I cut a two "frames" from a sheet of 5/8" plywood,
 then cut a circle out of a thinner hardwood panel.


I painted them with a black chalkboard paint.


Once dry I glued and nailed the frames on either side of the chalkboard making it like a sandwich.


Clamp it down and let it dry.


Next I needed an arm at the top of the corbel. I had a decorative piece that I salvaged from an old buffet hanging around. I'll use it on one of the corbels and use some 1x4s to make a similar one.  


After cutting and sanding the edge I ran it through the table saw to mimic the groove in the other piece.


I'm adding a small piece of wood between the arm and the corbel to make it a little easier to join the two pieces together.


I cut a piece of cove trim to dress it up a bit and attached it to the bottom of the arm.


The smaller wider piece is screwed to the bottom of the arm...


...then I started the screws in the small piece...


...and attached it to the corbel.

Once the construction was done I mixed up some home made chalk paint in a basic brown.


Then I dry-brushed on some lighter colored paint on all the high spots to mimic some distressing.


I made a black glaze, painted it on and gently wiped it off, trying to push it into all the little crevices. 


I ended up with two really cool chalkboard signs!

Saturday, November 28, 2015

Upcycled Pet Bed From a Drawer...(No, You Have NOT Seen This One Before)

This is a drawer that I got from a bureau on the side of the road. I also had a few strips of plywood left over from another project. I'll use them to frame the tent I'm going to make.


It will be a simple box on the bottom with a tent on top. This is a sketch of the shape of the tent. I'll use my angle tool copy the angle and transfer it to my miter saw.


The fame will be two layers of plywood that overlap.


I wanted to make the tent removable and collapsible so I didn't want to just nail the cross pieces to the frame. 


 Cross pieces in the bracket.


 The assembled tent frame.


I had to trim off the edges of the drawer.


 I used a few pieces of 1 x 4 to strengthen the bottom of the drawer.


I cut out an entrance for my dog.


Then I painted it with some chalk paint I had and used some black glaze to give it a faux wood grain look.


 I set the frame atop the bed, laid out a piece of canvas over it, cut it a few inches bigger than the frame and marked it.


                A seam was sewn along the bottom edge, and the canvas sides were cut a few inches bigger than the frame.


 First I stapled the the side on.


 With the bracket sides of the frame facing out I stapled the my biggest piece of canvas--wrong side out--to the top of the frames, making sure to keep it on the line that I traced. I put the staples as close to the edge of the frame as I could. 


Then I carefully turned the whole thing inside out.


 I put the spacer pieces into the brackets.


And used my grommet kit to and a few grommets to the front panels so I can tie them back. 


The finished bed.


Jessie Approved.

Saturday, June 13, 2015

Victorian Era Folding Chair Redo


This was the shape of the carpet panels when I got the chair. Dry and torn, they had to go.


The new upholster weight fabric panels are triple reinforced and as much of the original hardware as possible is used to reattach them.


The wood was just given a coat of bee's wax and orange oil to give it some luster.


The maker's label was difficult to read but I got this much:
E.W. Vaill, Patentee and ManufacturerPatented April ??, 187?
A quick search revealed the chair was manufactured locally in Worcester, Massachusetts likely between 1870 and 1895. 


Monday, January 26, 2015

Suitcase Hatbox Upcycled into Vintage Clock


I got this suitcase at a yard sale, the inside was in great shape and I thought it would sell well in my Etsy shop. It was only after I got it home that I realized the bottom panel, that functions as a hinge was torn. Fixing it would have been too tough, So I thought, maybe a clock.  


Since I'd be painting the bottom panel, I tested drawing and painting on numbers. It didn't go so well. So I tested mod podging one of my Etsy shop labels on the back and was happy with the results.


I measured the suitcase and made a clock face to fit. (I used Microsoft Publisher, but everyone has their favorite.) And carefully cut it out.


I tested the fit and marked the center and places where the pieces met. I had to tape them down as they tended to shift around.


I "painted" both sides of each piece with water to stretch it before it went on the suitcase. Wet paper stretches like crazy, by wetting it first I'll get fewer wrinkles.


 I painted the mod podge on to the suitcase and carefully put each piece of the clock face in place,


 I already have a lot of paint on hand, so I used a red that was as close a match as possible and painted the bottom panel. (It'll dry a little darker.)


I got a scrap piece of plywood and traced the curve of the suitcase on it. I'll cut it and mount it inside the suitcase to so it can be hung on the wall.


I glued the plywood in the suitcase, nailed it on through the back of the suitcase, and drilled a hole.


THE FAIL. The red paint didn't match well. So I made some labels to fit the the bottom.


While the mod podge was drying I began getting familiar with the new clock movement. It's super easy to install.


Once the bottom label was dry I drilled a hole through the face panel, inserted the clock motor and put the hands on.


At the time of this posting the clock is for sale at my Etsy shop